
Optimizing Member Flow with a Gym Equipment Layout
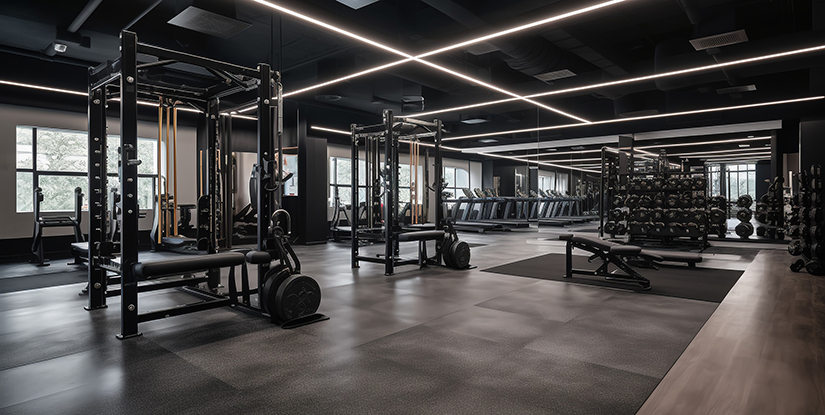
Identifying Bottlenecks in Facility Throughput
In the commercial fitness sector, the most significant invisible cost is not equipment depreciation, but the friction caused by inefficient spatial utilization. When members encounter congestion in high-demand zones, it leads to decreased satisfaction and, eventually, increased churn rates. Optimizing member flow with a gym equipment layout requires a transition from a purely aesthetic arrangement to a data-driven, kinetic-centric strategy. The problem often stems from a lack of spatial foresight, where equipment is placed based on available floor dimensions rather than user movement patterns.
A common cause for these bottlenecks is the 'clumping effect,' where high-use machines—such as cardio essentials or popular strength stations—are clustered together without sufficient buffer zones. This results in a high-density knot that prevents movement throughout the facility. To fix this, operators must analyze the kinetic rhythm of a typical workout cycle. A successful resolution involves creating distinct zones that separate high-intensity movement from static lifting. Once the fundamental movement patterns are understood, the next step is to apply specific zoning frameworks to the physical footprint.
Defining High-Traffic vs. Low-Traffic Zones
To effectively manage density, operators should categorize equipment based on its typical dwell time and user interaction frequency. A well-structured layout prevents the 'congestion loop' where one occupied machine halts the movement of five others.
- High-Density Zones: Cardio equipment, functional training areas, and popular compound lifting stations. These require the widest buffer zones.
- Low-Density Zones: Specialized machines (e.g., hip abductor, calf raises) and isolated strength equipment. These can occupy more compact footprints.
By categorizing these zones, an operator can move from general placement to strategic positioning, which leads directly into the technical requirements of spatial buffering.
Establishing Functional Buffer Zones and Clearance Standards
Transitioning from broad zoning to specific placement requires a rigorous understanding of clearance standards. A frequent failure mode in gym design is the failure to account for the 'extended footprint'—the space required not just for the machine itself, but for the user's full range of motion and the subsequent exit/entry path. If machines are placed too close together, members feel encroached upon, leading to a perceived lack of privacy and increased physical risk.
To ensure safety and fluid movement, operators should implement a standardized clearance protocol. For example, a treadmill requires not only the machine's dimensions but also a safe 'run-off' zone behind it. Neglecting these variables is a mistake that leads to higher liability and lower member trust. The following table outlines recommended clearance categories to guide your layout planning.
| Equipment Category | Typical Use Type | Recommended Clearance (Min) | Critical Failure Mode |
|---|---|---|---|
| Cardio Machines | Continuous/Dynamic | 36 - 48 inches (Side/Rear) | Insufficient rear buffer for safe exit |
| Free Weight Benches | Variable/Expansive | 48 - 60 inches (Full Radius) | Collisions during weight plate loading |
| Strength Machines | Static/Linear | 18 - 24 inches (Radial) | Restricted movement during eccentric phase |
| Functional/Turf Areas | Multi-directional | Varies by tool (e.g., kettlebell swing) | Interruption of high-speed movement |
Adhering to these parameters ensures that the layout accommodates human error and physical variety. Once these physical boundaries are defined, the focus must shift to how different equipment categories interact within the total facility workflow.
Designing Sequential Workout Pathways
Optimizing member flow with a gym equipment layout is not just about the space around a single machine; it is about the logical sequence of the entire training session. A disorganized layout forces members to crisscross the facility multiple times to complete a standard circuit, which creates unnecessary foot traffic and increases the likelihood of collisions. This 'cross-traffic friction' is a primary driver of member frustration during peak hours.
The mechanism for a high-performing layout is the 'Flow Path Design.' This involves grouping equipment into logical training chains. For instance, a strength-focused member typically moves from large compound lifts to accessory movements. If the heavy barbell area is at one end of the building and the dumbbell rack is at the other, the member's path is inefficient. A successful fix is to implement a 'Gravity-Based Layout'—placing the heaviest, most foundation-building equipment at the center or rear and cascading lighter, more specialized equipment toward the perimeter or entrance.
The Logical Sequence Framework
To verify a successful sequence, operators should perform a 'Shadow Walkthrough'—simulating a three-stage workout to see if the path is intuitive. A well-designed path follows this logical progression:
- Stage 1: Warm-up/Activation: Cardio or dynamic stretching zones located near the entrance or transition areas.
- Stage 2: Primary Strength/High Intensity: Large-scale platforms and multi-functional rigs.
- Stage 3: Accessory/Isolation: Machine-based and specialized resistance equipment.
- Stage 4: Recovery/Cool-down: Stretching, mobility, or low-intensity zones.
By creating these intuitive chains, you minimize cross-traffic. However, even a well-sequenced path can be undermined by poor equipment density management if the volume of equipment is not balanced against the square footage.
Explore the complete technical specifications:
Balancing Equipment Density with Member Volume
A common mistake in gym procurement is over-investing in equipment volume without considering the spatial capacity of the facility. While it may seem profitable to fill every square inch with a new machine, doing so effectively kills the 'member flow' by eliminating all circulation space. This creates a high-density environment that feels cramped and unprofessional. The cause is often a focus on asset density rather than user experience.
To calculate the ideal density, operators should use a 'Load-to-Space Ratio.' This involves measuring the total usable square footage and subtracting the essential thoroughfares (entry/exit, locker room paths, and main aisles). The remaining 'Training Footprint' should then be populated based on your target member capacity. If your capacity is 100 members at peak, your layout must be able to support 100 concurrent activities without creating physical or visual congestion.
Density Decision Matrix
Use the following criteria to determine if you are adding too much equipment to a specific zone:
- Visual Density: Can you see more than 30% of the floor/walls between machines? If not, the area is over-crowded.
- The 3-Foot Rule: Can a person walk through the area with a towel or water bottle without brushing against a machine?
- Dwell-Time Correlation: Does the machine have a high 'dwell time' (e.g., a heavy squat rack)? If so, it needs a larger share of the density-to-space ratio.
Verifying these metrics periodically will prevent the layout from becoming obsolete as the gym's popularity grows. With density controlled, the next critical control point is the maintenance of the pathways themselves.
Explore the complete technical specifications:
Maintaining Path Integrity and Safety Compliance
Even the most brilliantly designed layout will fail if the pathways (the 'veins' of the facility) are neglected or blocked. A failure in maintaining path integrity often manifests as 'temporary congestion' caused by stray equipment, such as dumbbells left in aisles or weight plates scattered near movement paths. This is not just a flow problem; it is a critical safety hazard that can lead to tripping or collision-related injuries.
The fix is twofold: physical design and operational discipline. The layout must include designated 'Reset Zones'—specific, marked areas where loose equipment is expected to reside. Simultaneously, the facility management must implement a strict inspection cadence. A professional operator verifies path integrity through daily walkthroughs and a structured maintenance schedule. If a path is blocked, it is a failure of both the layout's ability to contain items and the staff's ability to enforce its use.
The Daily Path Audit Checklist
To maintain the high standard required to optimize member flow, staff should complete this daily checklist during peak and off-peak shifts:
| Audit Item | Verification Method | Expected Outcome |
|---|---|---|
| Unobstructed Aisles | Visual walk-through of all major corridors | Zero equipment or personal items in walking paths |
| Weight Station Order | Check dumbbell racks and plate trees | All weights returned to designated, labeled spots |
| Clearance Compliance | Check machine buffer zones | No stray benches or mats encroaching on safety zones |
| Signage Visibility | Check zone markers or floor markings | All directional/safety indicators are visible and clean |
Regularly verifying these checkpoints ensures that the kinetic energy of the gym remains fluid and that the layout functions as intended. This leads to the final consideration: how to adapt your layout as market trends shift.
Explore the complete technical specifications:
Exercise Equipment Suppliers | Professional Procurement Guide
Adapting Layouts for Future Market Trends
The final stage in mastering a gym layout is recognizing that a 'static' layout is a dying one. As the industry moves toward more specialized training—such as hybrid strength-cardio models or high-intensity functional training—your layout must be able to evolve. The problem is that many operators treat their layout as a permanent fixture, leading to a facility that feels dated and out of sync with modern fitness preferences.
To avoid this, adopt a 'Modular Layout' strategy. This involves using equipment with consistent footprints and perhaps even non-fixed elements like mobile weight benches or adjustable turf partitions. A modular approach allows you to reconfigure zones based on seasonal demand or shifting member demographics without a complete renovation. For example, if you notice an uptick in functional training members, you can temporarily expand the functional zone by adjusting the placement of lighter, mobile machines.
Predictive Layout Planning
To ensure long-term ROI, operators should evaluate their layout through two lenses: current usage data and future demographic shifts. This ensures the layout remains an asset rather than a constraint.
- Usage Analytics: Monitor which machines are 'over-worked' and which are 'dormant' to adjust density.
- Demographic Forecast: If your area is seeing an influx of younger, HIIT-focused members, prepare to expand the movement-based zones.
- Technology Integration: Leave space for upcoming digital/smart equipment that may require specific power or connectivity needs.
By treating the layout as a living, breathing component of the business, you ensure that the facility remains optimized for both current members and future growth. This continuous cycle of observation and adjustment is the hallmark of professional facility management.
Explore the complete technical specifications:
Optimizing Lighting and Sensory Elements for Flow Control
While structural placement is paramount, the psychological perception of space is heavily influenced by environmental factors. A poorly lit corner of a gym often becomes a 'dead zone' where equipment is neglected or, conversely, where members congregate in a way that disrupts the intended flow. To optimize member flow with a gym equipment layout, you must consider how light and sound influence movement patterns.
The decision criteria for lighting should be based on the intensity of the zone. High-intensity zones, like functional training areas, benefit from bright, high-contrast lighting that encourages alertness and movement. In contrast, recovery or stretching zones should utilize warmer, lower-intensity lighting to signal a transition in the workout sequence. A common mistake is applying uniform, high-intensity lighting throughout the entire facility, which fails to provide the necessary mental cues for different training stages.
Sensory Impact Checklist
Before finalizing your layout, evaluate how each zone feels from a sensory perspective:
- Light Transition: Does the lighting change as a member moves from cardio to strength to recovery?
- Acoustic Buffering: Are heavy lifting zones (which generate high noise) separated from relaxation zones by a visual or physical barrier?
- Color Cues: Do the floor colors or wall treatments help define the boundaries of a specific zone?
By integrating these sensory controls, you reinforce the physical layout with psychological markers, ensuring that the member's journey through your facility is as seamless and intuitive as possible.