
Optimizing Fitness Equipments: A Professional Guide to Selection and Maintenance
Managing Degradation in Commercial Fitness Equipments
Facility operators often face a critical bottleneck: the premature mechanical failure of high-use gear. This degradation typically stems from two primary drivers: inadequate environmental control and improper user-end tensioning. When heavy-duty resistance machines or cardiovascular systems fail ahead of their expected lifecycle, the cause is rarely a single catastrophic event but rather a cumulative breakdown of moving parts due to friction and moisture. Identifying these signs early prevents the high costs associated with unscheduled downtime and replacement. By understanding the specific wear patterns of different categories of fitness equipments, managers can shift from reactive repairs to a systematic, preventive operational model.
Identifying Early Warning Signs of Mechanical Fatigue
The first step in mitigation is recognizing the subtle shifts in performance. A change in the acoustic profile of a treadmill motor or a slight resistance irregularity in a cable machine is often the precursor to a total system lockout. Operators must look for visual indicators like fraying cables or localized discoloration on upholstery, which suggest material breakdown. Once these symptoms are identified, the transition to a formalized inspection protocol becomes the necessary next step for long-term stability.
Selecting High-Durability Strength Training Hardware
The tendency to prioritize aesthetic design over structural integrity is a common mistake in procurement. Selecting robust strength equipment requires a deep dive into material composition and load-bearing capacity. A high-quality rack, for instance, must balance steel gauge thickness with weld integrity to withstand the lateral forces of heavy lifting. Selecting the wrong grade of steel or neglecting the quality of the powder coating can lead to accelerated oxidation and structural weakness in high-humidity environments.
Material Specifications for Longevity
When evaluating procurement options, professionals should focus on specific material thresholds. Below is a comparative overview of common materials used in heavy-duty training environments to help guide your selection process.
| Component Type | Recommended Material/Finish | Failure Mode to Avoid | Verification Metric |
|---|---|---|---|
| Weight Racks/Frames | High-gauge Carbon Steel | Structural buckling/unbalanced welds | Weld smoothness and gauge thickness |
| Resistance Cables | Steel core with Nylon/Poly coating | Kinking or fraying of the outer sleeve | Smooth movement without tactile grit |
| Weight Plates | Cast Iron or High-Density Rubber | Cracking or uneven density | Consistent thickness and zero wobble |
| Upholstery | High-density Vinyl or PU Leather | Cracking or moisture absorption | Pore density and stitch strength |
Understanding these material nuances ensures that your initial investment translates into years of reliable service. With the correct hardware in place, the focus must naturally shift to how these assets are maintained and protected from the daily stresses of a commercial environment.
Cardiovascular Machine Operational Integrity
While strength equipment relies heavily on static load management, cardiovascular machines face the continuous stress of high-frequency vibration and heat generation. The primary failure mode for treadmills and stationary bikes is often related to internal friction within the motor or drive belt systems. Heat buildup is a silent killer of electronic components and drive systems, often exacerbated by poor airflow or inadequate space between machines. Addressing these environmental factors is essential for protecting the internal mechanics of the equipment.
Preventing Component Overheating and Friction-Based Wear
To keep cardiovascular units in peak condition, operators must manage the interplay between mechanical movement and environmental temperature. Excessive dust accumulation in the motor housing of a treadmill is a leading cause of circuit failure. Routine cleaning and the use of appropriate lubricants can significantly extend the life of these complex units. Ensuring that the air intake paths remain unobstructed is a critical operational requirement.
- Treadmill Deck Lubrication: Check belt tension and apply silicone lubricant at specified intervals to reduce motor strain.
- Stationary Bike Drive Trains: Monitor chain or belt tension to prevent slipping and ensure consistent resistance levels.
- Electronic Control Modules: Use specialized cleaners to remove perspiration residue from consoles to prevent short-circuiting.
The proactive management of these mechanical systems ensures that the high-value electronic components are not compromised by simple physical friction. However, the physical machine is only half of the equation; the surface it sits upon is equally critical to its operational lifespan.
Related reading:
Engineering Optimal Flooring and Shock Absorption
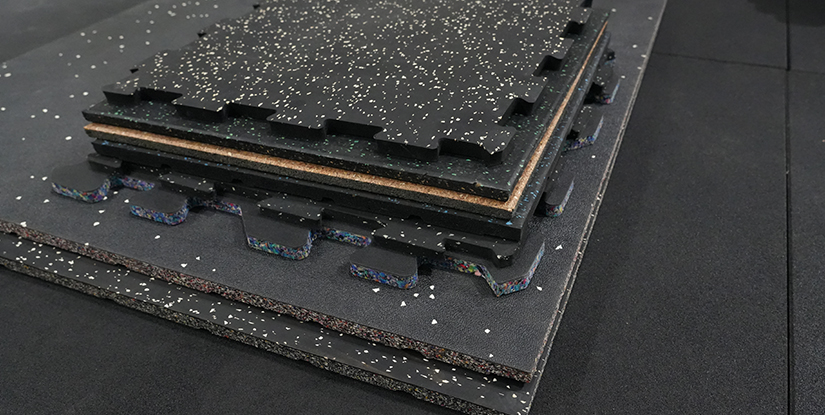
A frequent oversight in facility design is the disconnect between machine weight and floor-load capacity. Placing heavy power racks or high-impact cardio machines on inadequate surfaces leads to structural damage to both the equipment and the building itself. Excessive vibration from dropped weights or heavy footfalls can cause micro-fractures in the subfloor, which eventually compromises the leveling of the machines. Achieving the right balance of shock absorption and stability is vital for both safety and longevity.
Determining Shore Hardness and Impact Resistance
Selecting the correct flooring involves understanding the qualitative and quantitative requirements of the training zone. For example, a free-weight area requires a much higher level of impact absorption than a functional stretching zone. Using the wrong Shore hardness range for your specific training intensity can lead to premature wear on the flooring and increased noise pollution.
| Zone Type | Primary Requirement | Typical Flooring Material | Maintenance Focus |
|---|---|---|---|
| Heavy Lifting/Power Zone | High Impact Absorption | Recycled Rubber Tiles (20mm+) | Compression/Crush resistance |
| Cardio/Functional Zone | Low Impact/High Durability | Vulcanized Rubber or High-Density EVA | Surface cleanliness/Scuffing |
| Stretch/Yoga Area | High Comfort/Low Density | High-Density Foam/Mats | Tear resistance/Hygiene |
By aligning the floor characteristics with the specific mechanical stresses of the machinery, you mitigate the risk of structural instability. Once the physical foundation is secured, the attention must turn to the rigorous, repeatable processes of routine maintenance and inspection.
Related reading:
Implementing a Standardized Maintenance Cadence
The difference between a facility that thrives and one that suffers constant downtime is a disciplined maintenance schedule. A haphazard approach to repairs—fixing things only when they break—is the fastest way to increase your Total Cost of Ownership (TCO). A professional facility manager should implement a tiered inspection system that categorizes tasks by frequency and complexity. This ensures that minor issues are caught before they evolve into expensive component replacements.
Tiered Inspection Protocols for Facility Managers
A successful maintenance program relies on clearly defined intervals. Below is a standardized checklist to assist in creating your operational documentation.
- Daily (Operator Level): Visual inspection of cables, wiping down upholstery, and checking for loose bolts on moving parts.
- Weekly (Supervisor Level): Testing electronic console responsiveness, checking belt tension on cardio units, and checking floor stability.
- Monthly (Technical Level): Deep cleaning of motor housings, lubricating drive chains, and performing full-system diagnostic checks.
- Quarterly (Comprehensive): Full structural weld inspections, torque verification for all heavy-duty racks, and electrical safety testing.
A consistent cadence transforms maintenance from an unexpected expense into a predictable operational cost. With these protocols in place, the next logical phase is the deployment of a systematic troubleshooting guide for when issues do inevitably arise.
Related reading:
Troubleshooting Common Mechanical Failures
Despite the best preventive measures, mechanical systems will eventually encounter deviations from standard performance. The key to rapid resolution is a structured approach to diagnosis: move from the most visible symptom to the most complex internal cause. Most common issues are caused by lack of lubrication, misalignment, or environmental interference rather than total mechanical failure. Developing a diagnostic flowchart can significantly reduce the time between a reported issue and its resolution.
Diagnosing Resistance and Movement Irregularities
When a user reports that a machine feels 'different,' it is usually an indicator of a change in the mechanical equilibrium. The following table outlines common symptoms, their likely causes, and the necessary verification steps for technicians.
| Reported Symptom | Likely Root Cause | Verification Action |
|---|---|---|
| Increased Resistance/Grit | Lack of lubrication or debris in tracks | Clean tracks and re-apply approved lubricant |
| Noisy/Squeaking Sound | Loose bolts or worn bearings | Tighten all fasteners and check bearing play |
| Erratic Electronic Behavior | Moisture buildup or loose wiring | Inspect console connections and clean with dry cloth |
| Uneven Machine Movement | Misaligned belt or drive system | Check belt tension and alignment via manual rotation |
Effective troubleshooting prevents the unnecessary replacement of expensive components when a simple adjustment or cleaning would suffice. The ability to diagnose quickly is the final step in mastering the operational lifecycle of your facility's assets.
Related reading:
Verifying Performance and Safety Compliance
The final stage of any maintenance or repair cycle is the verification of the fix. A common mistake is assuming that a component is functional simply because the symptom has disappeared. In a commercial setting, you must verify that the machine has returned to its original specification and that all safety tolerances are met. This is especially important for high-load equipment where even a minor misalignment can lead to catastrophic failure under load.
Protocols for Post-Repair Verification
Before returning a piece of equipment to active service, the following verification steps should be performed and documented in a maintenance log. Documentation is not just for record-keeping; it is a legal and operational necessity in high-traffic facilities.
- Load Testing: For strength equipment, perform a controlled, low-weight load test to check for structural stability and any new sounds.
- Cycle Testing: For cardio equipment, run the machine through several uninterrupted cycles at varying speeds to monitor heat and resistance stability.
- Visual Recertification: Ensure all covers, guards, and upholstery are correctly seated and that no tools or parts were left inside the mechanism.
- Digital Log Entry: Record the date, the specific component replaced, and the technician's signature to maintain a complete audit trail.
A rigorous verification process ensures that your efforts in maintaining fitness equipments actually translate to a safer and more reliable environment. By following these structured guides, from procurement to verification, you secure the longevity of your facility's most valuable assets.