
Optimizing Facility Layout with a Custom Weight Rack Solution
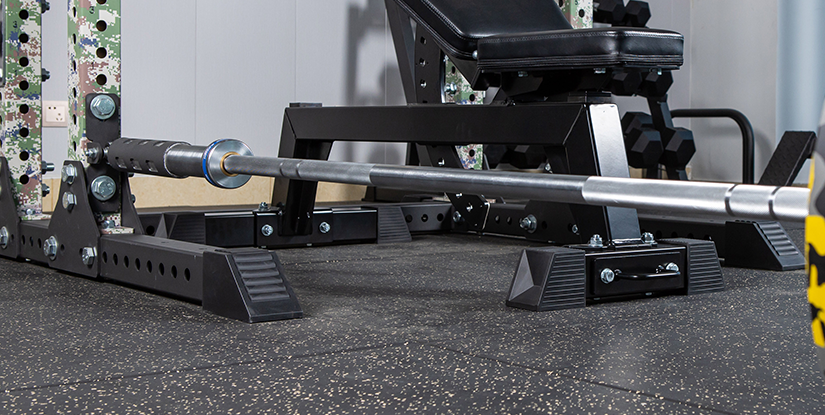
Structural Integrity and Load Distribution Foundations
Facility operators often face the recurring problem of structural fatigue or uneven floor loading when installing high-density storage solutions. A standard, one-size-fits-all rack may fail to account for the specific weight distribution requirements of a high-traffic commercial gym. If the footprint of the unit does not align with the structural capacity of the subfloor, the resulting stress can lead to microscopic shifts in the base, eventually causing frame misalignment or even catastrophic failure under full load. To avoid these issues, understanding the relationship between static weight and dynamic movement is essential.
Material Thickness and Gauge Standards
When specifying a Custom Weight Rack, the first technical parameter to audit is the steel gauge. Commercial-grade equipment typically utilizes heavy-wall steel tubing to resist buckling. A common mistake in procurement is prioritizing aesthetic finish over wall thickness; a thin-walled rack may look impressive but will deform under the shear stress of heavy dumbbell sets. Operators should verify that the frame thickness meets the projected load-bearing requirements of their specific inventory.
| Component Type | Standard Requirement | Failure Mode if Sub-standard |
|---|---|---|
| Frame Tubing | Minimum 11-gauge or 3mm wall | Structural buckling under heavy load |
| Base Plate | Reinforced steel with wide footprint | Floor deformation or unit tipping |
| Support Uprights | High-tensile structural steel | Vertical sway during loading/unloading |
| Joint Welds | Continuous fillet welds | Stress fractures at high-vibration points |
Establishing a baseline for material quality ensures that the structural integrity remains intact over years of heavy use. Once the material specifications are locked in, the focus must shift to the physical configuration and spatial footprint.
Spatial Optimization and Footprint Configuration
The technical challenge of integrating a custom storage solution into an existing facility is rarely about the rack itself, but rather the spatial relationship between the unit and the surrounding floor area. Poorly calculated footprints lead to 'bottlenecking,' where the sheer presence of the rack restricts athlete movement or creates safety hazards during high-intensity training. To resolve this, designers must transition from looking at the rack as a static object to viewing it as a dynamic part of the floor plan.
Zoning and Clearance Protocols
A professional installation requires more than just enough room to fit the rack. You must account for 'operational clearance'—the space required for an athlete to move around the unit while carrying or placing weight. A common failure in facility planning is neglecting the 'swing zone' of moving parts or the clearance needed for heavy plate loading. A properly designed custom solution should incorporate these buffer zones into its total footprint. Verification involves simulating the most cumbersome movement possible within the designated area to ensure no contact with adjacent equipment.
Vertical Height and Ceiling Constraints
While floor space is a primary concern, verticality is the secondary constraint. In many commercial settings, the height of the rack must be reconciled with ceiling-mounted lighting, ventilation ducts, or fire suppression systems. A mismatch here can lead to accidental strikes or interference with facility maintenance. Before finalizing a design, measure the distance from the highest point of the rack to the lowest overhead obstruction to ensure a safe operational margin.
With the physical footprint and vertical constraints established, the next critical step is the precise alignment of storage modules to prevent mechanical wear.
Precision Loading and Component Alignment
Even a perfectly engineered rack will suffer premature degradation if the loading mechanics are poorly aligned. Misalignment occurs when the weight-bearing pegs, hooks, or rails are not perfectly perpendicular to the primary frame. This causes eccentric loading, where the weight pulls the rack toward one side, creating a constant torsional stress that weakens the welds and fasteners over time. Solving this requires a move toward highly adjustable or modular component systems.
Peg and Hook Tolerance Standards
When dealing with specialized weight storage, the interface between the weight and the rack is the most common point of failure. If the receiver for a dumbbell or a barbell is too loose, the weight will bounce or vibrate during placement, leading to impact damage. Conversely, if it is too tight, it increases friction and can damage the equipment itself. Operators should look for components that offer a balance of grip and ease of movement, often achieved through high-quality powder coating or specialized bushings.
- Verification Step: Check that all weight-bearing surfaces are level using a standard machinist level.
- Common Error: Using non-standard weights that do not match the receiver diameter, causing uneven weight distribution.
- Maintenance Tip: Inspect the contact points for signs of metal-on-metal scoring, which indicates misalignment.
By ensuring that every component is aligned to a high tolerance, you reduce the cumulative stress on the frame, which leads directly to the necessity of a robust maintenance regimen.
Related reading:
Preventative Maintenance and Inspection Cycles
Preventing a failure before it occurs is far more cost-effective than replacing damaged structural steel. A structured maintenance schedule is the difference between a long-term asset and a liability. The primary driver of wear in a commercial environment is not just the weight itself, but the repetitive impact and vibration caused by high-volume usage. Therefore, inspections must focus on both the visible and the non-visible components of the system.
The Three-Tiered Inspection Framework
A professional facility manager should implement a tiered approach to equipment care, ranging from daily visual checks to deep-dive mechanical audits. This ensures that minor issues, such as a loose bolt, do not evolve into major structural problems.
| Inspection Tier | Frequency | Primary Focus Areas | Success Metric |
|---|---|---|---|
| Level 1: Visual | Daily | Visible cracks, displaced weights, floor cleanliness | No obvious debris or structural shifts |
| Level 2: Tactile | Monthly | Bolt tightness, surface scratches, coating integrity | Zero loose fasteners or significant metal exposure |
| Level 3: Structural | Quarterly | Weld integrity, floor-load leveling, alignment accuracy | Frame remains perfectly plumb and level |
Failure to perform these checks often results in 'creeping failure,' where a small amount of play in a joint eventually leads to a complete loss of structural rigidity. Once these maintenance protocols are ingrained in the facility culture, the focus shifts to the long-term ROI and procurement strategy.
Related reading:
Procurement Strategies for Long-Term ROI
Purchasing a high-end storage solution is an investment in the facility's durability, not just a one-time expense. The most frequent mistake made by procurement managers is evaluating the price of the unit without calculating the Total Cost of Ownership (TCO). A cheaper, mass-produced rack may save capital upfront but will require frequent replacement or expensive repairs due to its inability to handle the rigorous demands of a commercial environment.
Evaluating Supplier Technical Documentation
When sourcing a Custom Weight Rack, you must demand more than just a catalog. A reliable supplier will provide detailed technical drawings and load-rating certifications. You should be able to see the cross-section of the steel, the type of welding used, and the specific weight capacities for every individual shelf or peg. This data allows you to perform a quantitative comparison between competing models rather than relying on qualitative marketing claims.
Decision Matrix for Equipment Sourcing
Before finalizing any purchase, use the following checklist to evaluate potential options against your specific facility needs:
- Capacity Verification: Does the supplier provide per-peg load capacities?
- Modular Potential: Can the unit be expanded with new modules if inventory grows?
- Surface Finish: Is the coating resistant to high-humidity or high-contact environments?
- Lead Time Buffer: Does the procurement timeline account for potential installation delays?
Understanding these economic drivers allows for a more strategic approach to facility growth. With the procurement plan in place, the final step involves the actual installation and the verification of the installation environment.
Related reading:
Installation Verification and Environmental Controls
The final stage of implementing a custom storage solution is the actual installation and the subsequent verification of the environment. A high-quality rack is only as stable as the floor it sits on. Even the most robust steel frame will fail if the installation process ignores the nuances of the facility's subfloor or the environmental conditions of the room.
Subfloor and Load-Bearing Verification
Before any heavy steel arrives at your facility, you must verify that the floor can handle the concentrated load. In many modern buildings, the weight is distributed across a large area, but a rack creates a 'point load' where the weight is concentrated on a very small footprint. If the subfloor is not engineered for this, you may see cracking in concrete or bowing in wooden platforms. It is essential to consult with the building's structural engineer if you are unsure about the floor's load-bearing capacity.
Environmental Impact on Metal Longevity
Humidity and temperature fluctuations also play a critical role in the lifespan of your storage systems. High-moisture environments, such as gyms near pools or in coastal areas, can lead to accelerated oxidation if the protective coating on the steel is insufficient. A Custom Weight Rack designed for a high-humidity environment should feature specialized powder coating or galvanized finishes to resist corrosion. Verify the coating specifications during the procurement phase to avoid premature rust and surface degradation.
Installation Checklist for Facility Managers
Ensure your onsite team follows these final checks during the arrival and setup phase:
- Leveling Check: Has the unit been leveled using a machinist level on all primary uprights?
- Anchor Verification: Are all floor anchors securely seated and tightened to specification?
- Clearance Audit: Is there a minimum 36-inch (or local standard) buffer around the operational zones?
By rigorously following these installation and verification steps, you ensure that your equipment remains a safe, reliable, and highly efficient part of your fitness facility for years to come.